
What it is
The Price book (in Settings, under More) is your list of items and prices: labor, materials, services and fees. Each item can have a unit, a price, your cost, a code, a description the customer sees, a photo, and options such as sizes with their own price. On an estimate, Add from price book… fills a line from an item so you don't retype prices.
When to use it
- You're setting up Crulex and want your usual prices ready for estimates.
- Your prices or costs changed and you want new estimates to use the new figures.
- You have a price list in a spreadsheet and want to bring it in.
Before you start
- Available on: the Pro plan, for importing a CSV.
- You need permission to change settings to add or edit items. Seeing and changing Your cost ($) needs permission to see costs.
- Importing a spreadsheet needs it saved as a CSV file with a header row and at least a Name and Price column.
Steps
- Go to Settings and click Price book (under More). You see every item with its category, unit, price, cost and whether it's taxable.
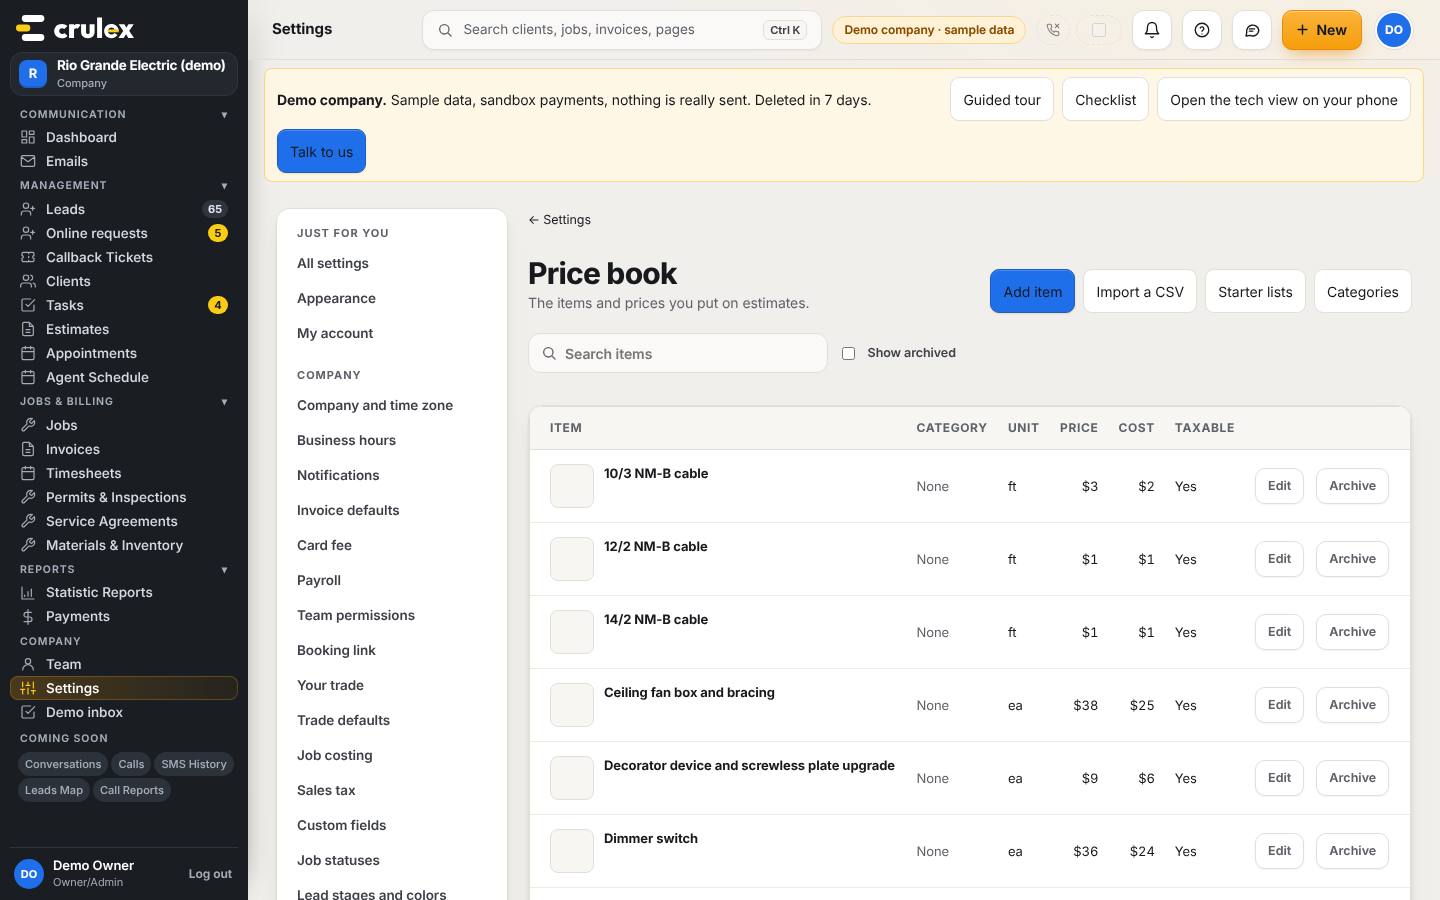
The Price book with Add item, Import a CSV, Starter lists and Categories above the item list - Starting fresh? Click Starter lists and click Add these … items for your trade to get typical items and prices, then change anything to match how you work.
- Click Add item. Type the Name, pick a Category and Kind (Service, Labor, Material or Fee), add the Unit, Price ($) and Your cost ($), tick Taxable by default if it is, and add a Description (the customer sees this).
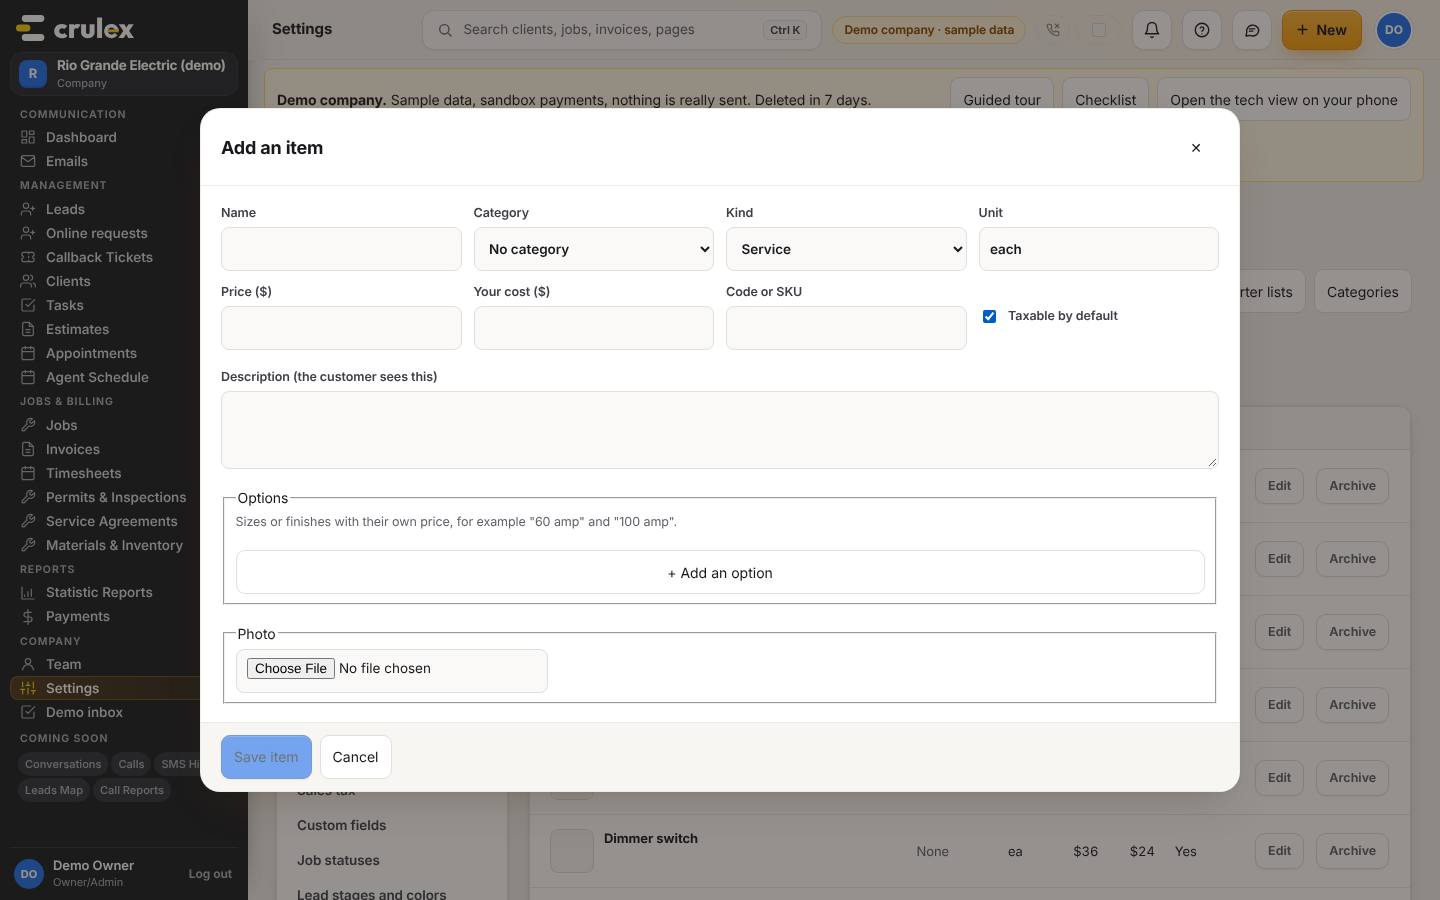
The Add an item form with name, kind, price, cost, options and photo - For sizes or finishes with their own price, click + Add an option (for example "60 amp" and "100 amp"). Add a Photo if you like, then click Save item.
- To group items, click Categories, type a name and click Add. A category can have one level of sub-categories.
- To bring in a spreadsheet, click Import a CSV and choose the file. Check the preview of every row: nothing is added until you click Import, and you can undo it afterwards.
- On an estimate, use Add from price book… under an option and pick the item (and its size, if it has options). Check the line and click Add.
How to check it worked
- The new item shows in the Price book list with the price you typed.
- On an estimate, the item appears in Add from price book… and fills in the name and price.
Common mistakes
- Expecting old estimates to change. Changing a price only affects lines you add afterwards; lines already on an estimate keep their price.
- Deleting an item you no longer sell. Use Archive instead; tick Show archived to see it again and bring it back.
- Looking for the price book on invoices. Items are added from the price book on estimates; invoices made from an estimate or job carry its lines over.