
What it is
An estimate is your price for a job. It can have up to five options (for example Good, Better and Best), each with its own lines and total. You email the customer a secure link; they pick an option, can tick optional add-ons, type their name, sign and approve. Approved estimates can ask for a deposit and become a job or an invoice with one click. You can add cover, terms and warranty pages, and an agreement the customer must sign before paying.
When to use it
- A customer wants a price before you start work.
- You want to offer a few choices at different prices and let the customer pick.
- You need a signed approval, and maybe a deposit, before you order materials or book the crew.
Before you start
- The customer must exist in Crulex with an email address. Starting from a lead's Create estimate step makes the customer for you.
- Fill your Price book so you can add lines with a click (see the price book guide).
- Check Estimate settings (in Settings, under More): the default deposit, how long the customer's link works, the accept-button wording and your starting cover, terms and warranty pages.
- To ask for a signed agreement before paying, write one first in Settings, Agreements (Start from an example gives you a work authorization).
Steps
- Click Estimates in the sidebar and then New estimate. Choose the Customer (type in Find a customer to narrow the list), add a Title, the first Option name and the lines (Item, type, Qty, Unit price ($)), then click Create estimate. Or click Create estimate on a lead.
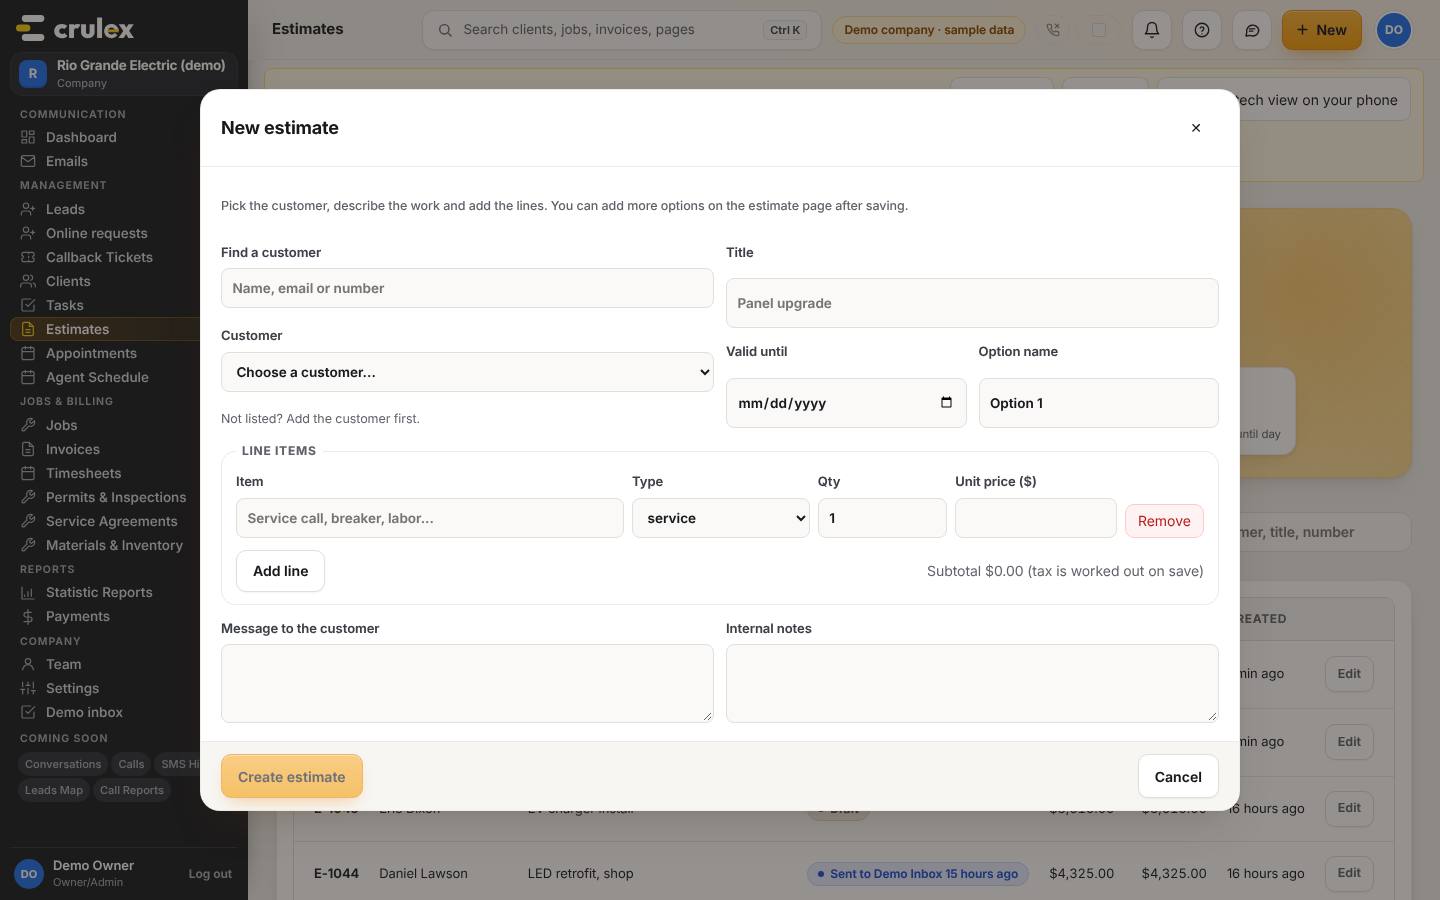
The New estimate form with the customer, title, option name and lines - On the estimate, add lines to each option with Add from price book… or by typing an item and price, then click Add. Tick optional on a line to make it an add-on the customer can choose.
- Click + Add option for a Better or Best choice, or Copy last option to start from the one above. Rename an option by clicking its name, and add Option details (the customer sees this).
- Set the Deposit (Percent or Fixed $), Valid until and Message to customer near the top. Under Cover, terms and warranty, add pages and fill in their blanks. Under Agreement before paying, choose an agreement and click Require before paying if you need one signed.
- Click Preview as customer to see exactly what they'll see. Signing and paying are switched off in the preview.
- Click Send for approval in the Next step bar, or Email estimate at the bottom. The customer gets a secure link that works for the number of days in Estimate settings.
- The customer opens the link, picks an option, ticks any add-ons, types their name, signs, ticks the box and clicks Sign to accept. If there's a deposit, they can pay it straight away on the same page.
- Back on the estimate it now says Approved. Use the Next step bar: Create job to make the job from the chosen option, Request deposit to email a fresh deposit link, or Invoice to bill it without a job.
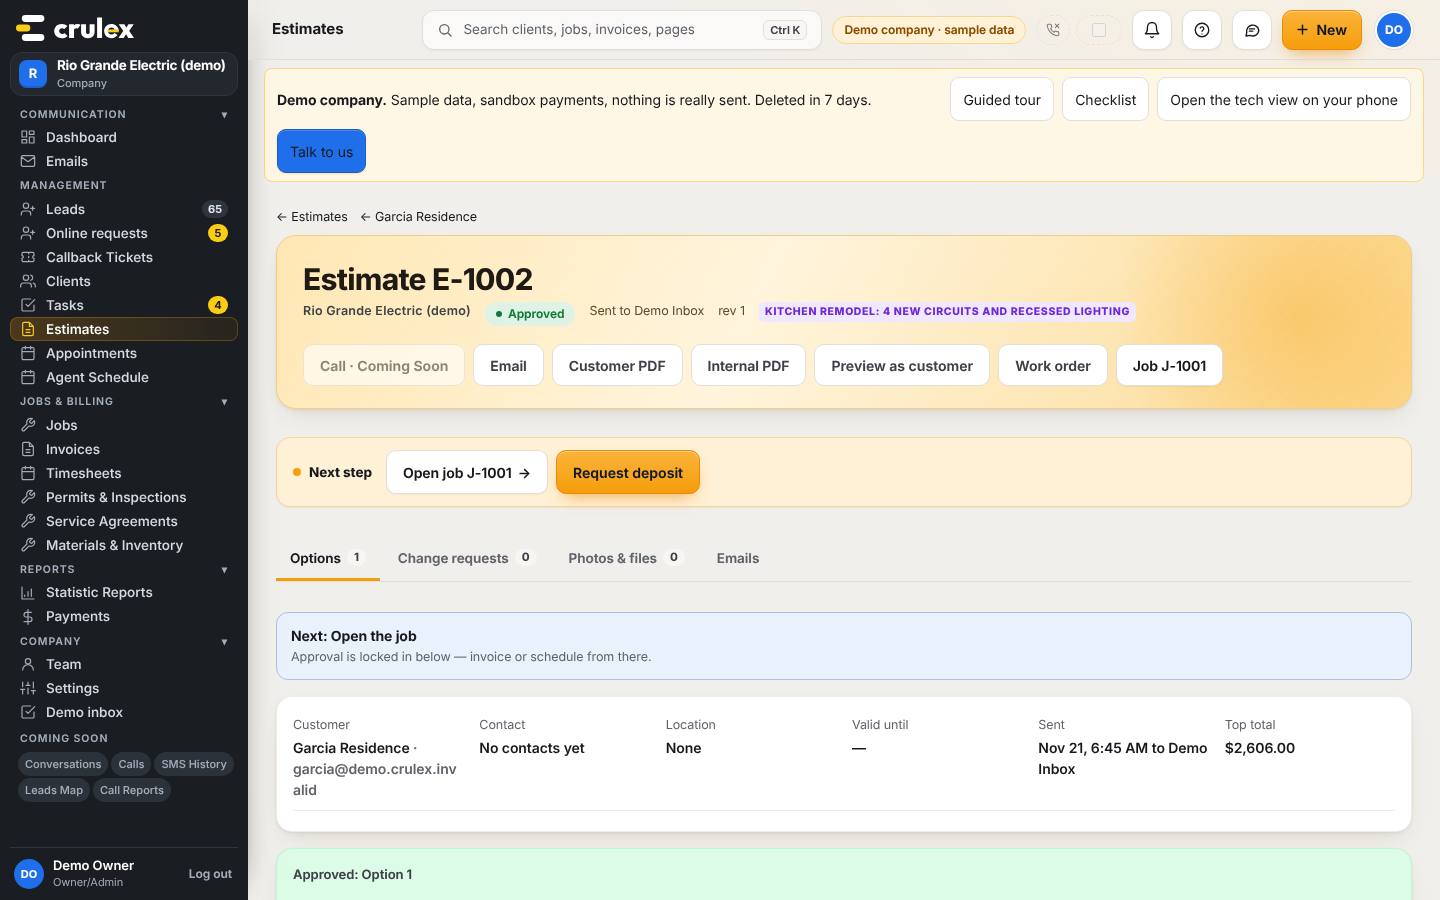
An approved estimate with the Next step bar showing the next actions
How to check it worked
- The estimate's status changes from Draft to Sent, then Viewed when the customer opens it, then Approved.
- The approved estimate shows Approved: with the option they chose, who signed and when.
- After Create job, you land on the new job with the chosen lines, and the estimate shows Open job.
Common mistakes
- Changing an estimate after it's approved. Approved estimates, their pages and what the customer saw are locked. Make a new estimate for extra work.
- Sending before the options are finished. If you change the estimate after sending, send it again; the customer's link always shows the latest version and they can't sign old wording.
- Expecting Invoice next to Create job once a job exists. A job is billed through the job, so the estimate only offers Open job.
- Forgetting the agreement blocks payment. With Require before paying on, the customer can't pay the deposit until they've signed it.