
What it is
Settings is where your company is set up: your details and logo, time zone, business hours, sales tax, invoice defaults, team, booking link and more. The top of the page has a Finish setting up checklist that ticks itself, a search box, and tiles grouped under Your company, Money, Customers and sales, Jobs and team and Connections and you.
When to use it
- You've just started and want to finish setting up your company.
- You need to change one setting and don't know where it lives.
- You want to check which outside services Crulex can connect to.
Before you start
- Most company settings need a role that can change company settings (the owner can by default). Others only see the tiles their role can use.
- Have your logo, business address, contact email and sales tax rate to hand.
Steps
- Click Settings in the side menu (under Company). The page opens on All settings.
On a phone: Tap Menu at the bottom of the screen and scroll down to Settings under Company. The settings menu becomes a row of buttons you swipe sideways.
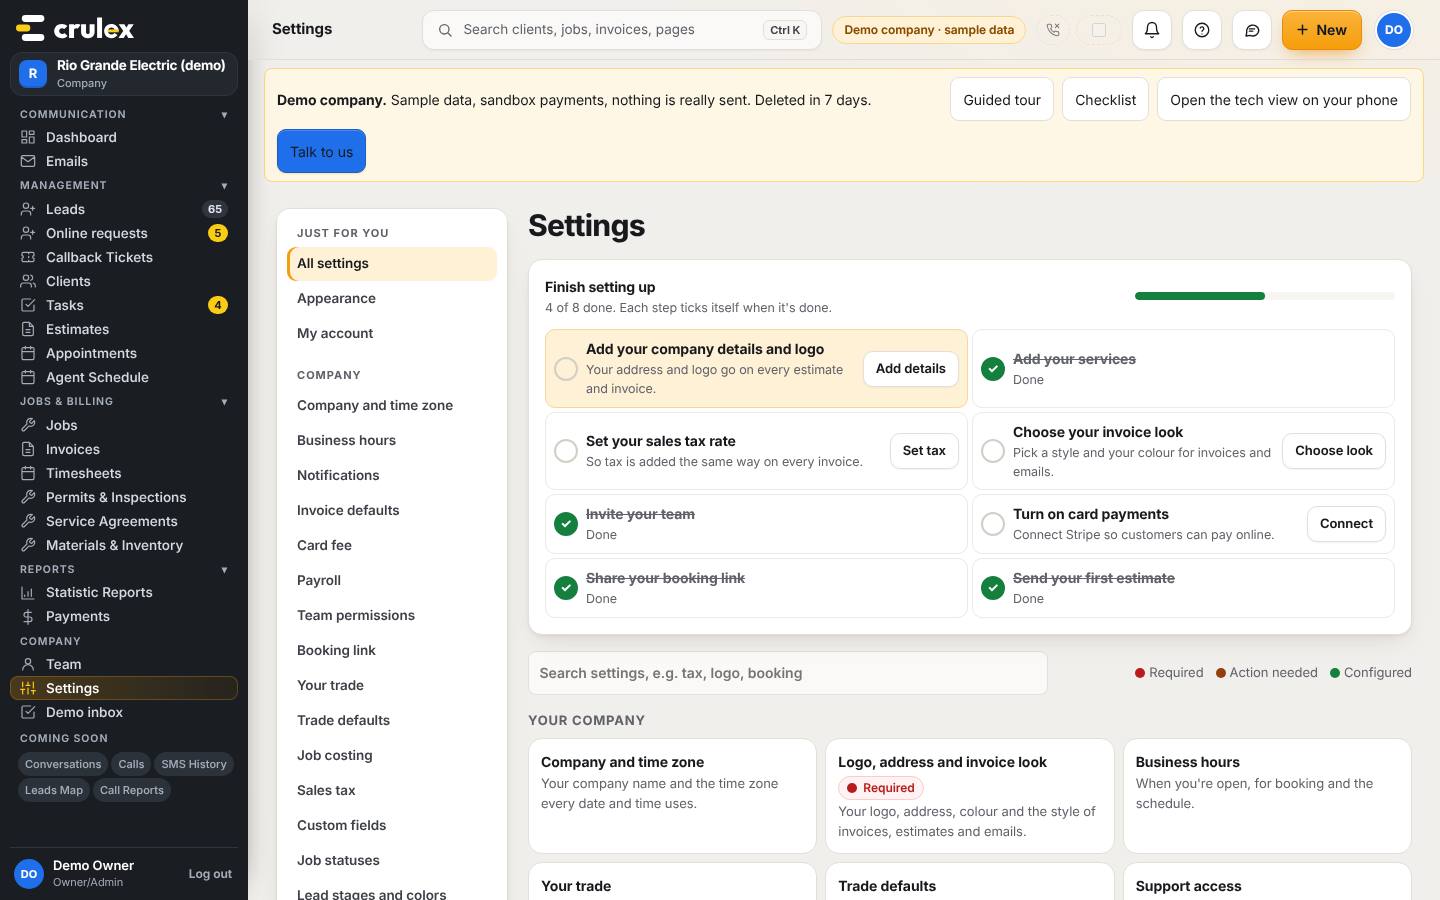
The Settings page with the Finish setting up checklist and the settings search - Work through Finish setting up. Click the button next to a step that isn't done (for example Add details, Set tax or Choose look). Each step ticks itself once it's done, and the card goes away when all eight are.
- To find a setting, type in Search settings (for example "tax" or "logo") and click the tile. A red Required or orange Action needed dot means something still needs you; green Configured means it's set.
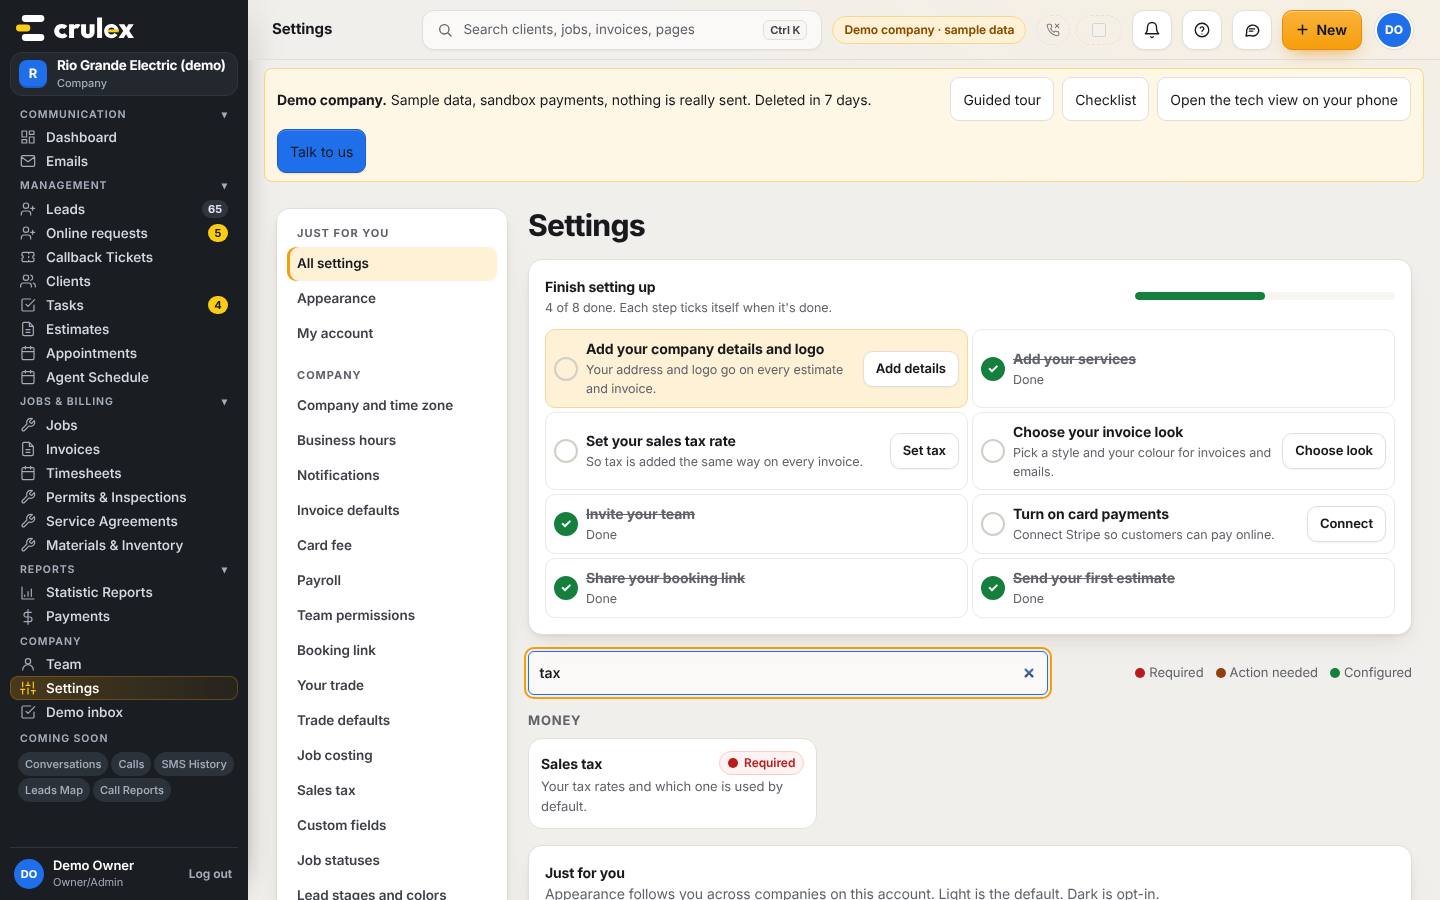
Settings search showing the tiles that match "tax" - Your business name, logo, address and contact email are under the Logo, address and invoice look tile, in Business identity. Click Save branding when done.
- Under Company time zone, pick your zone in Time zone, click Save time zone, then Yes, change time zone. Every date and time in Crulex uses it.
- Under Tax rates, type your rate into the box next to Default (it saves when you click away), or add another with a name and percent and click Add rate. Click Make default to use a different one.
- To see outside services, click Connections in the settings menu. Use the chips (Payments, Accounting, Payroll, Calendar, Calls & texts) to filter. Each card says whether it's connected, not connected, or not available yet.
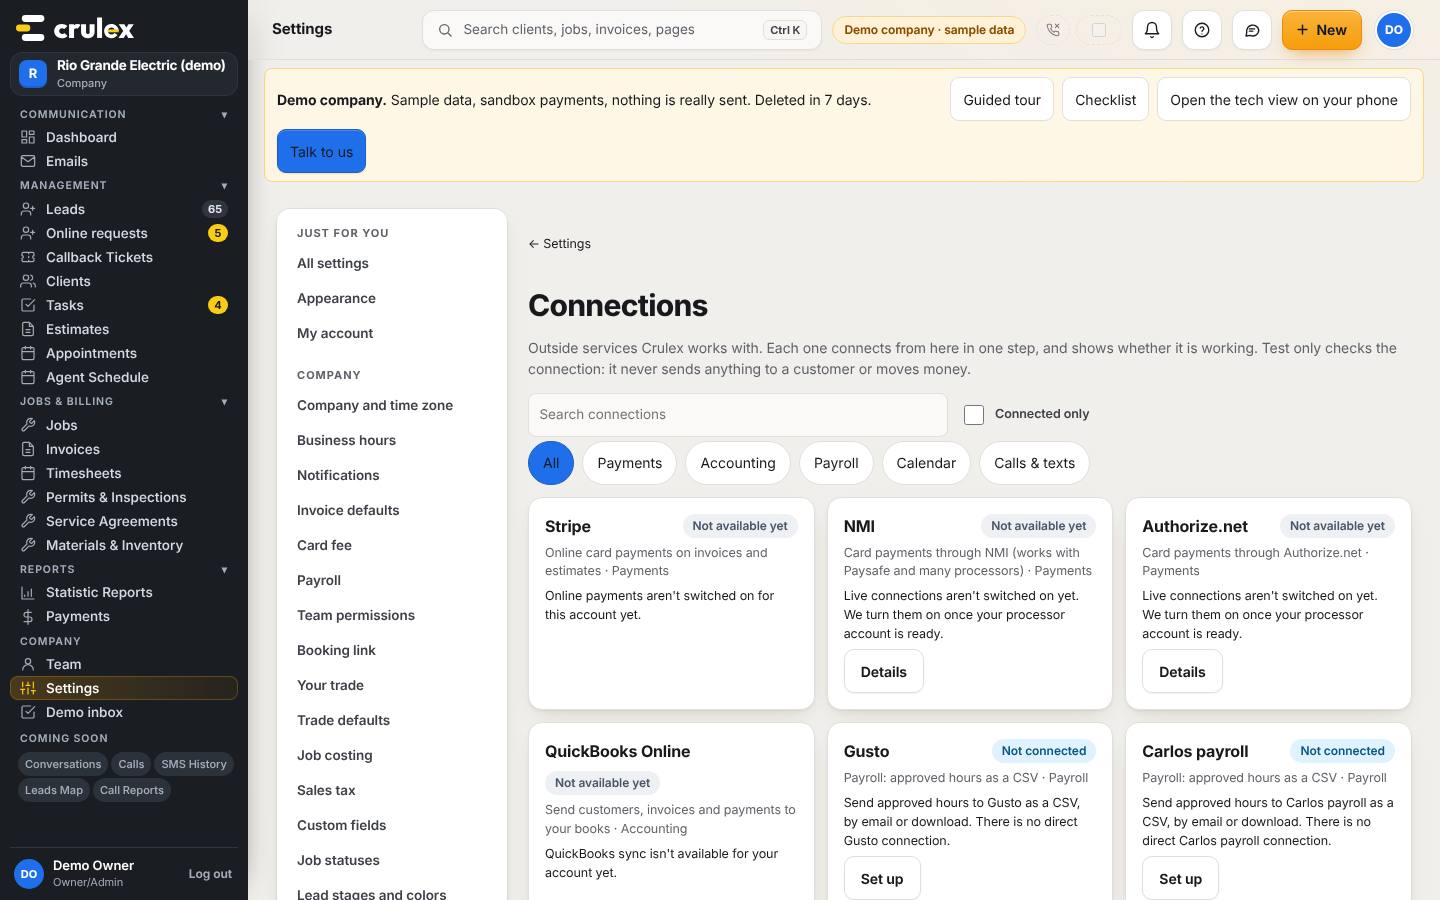
The Connections page with cards for payments, accounting, payroll, calendar and texts - Crulex support access (near the bottom of the page) lists any time Crulex support looked at your account to help you: who, why and for how long. Support can only look, not change anything.

How to check it worked
- The Finish setting up bar fills up and the step you finished shows Done with a tick.
- A tile you set up shows a green Configured dot.
- After saving the time zone, Current: at the top of Company time zone shows the zone you picked.
Common mistakes
- Leaving the default tax rate at 0%. Tax isn't added until you set a rate, and the setup step stays unticked.
- Changing the time zone after visits are booked without reading the warning. The visits keep the same moment, so their clock times read differently.
- Looking for QuickBooks or texting under Connections and expecting them to work. Their cards say Not available yet or Coming Soon.