
What it is
Custom fields are your own boxes on a record, like Gate code on a customer or Panel location on a job. You choose which ones show as a column or a filter on the list, and which can be used in emails. Message templates are a library of ready-made wording (an estimate check-in, a payment reminder, "on our way") with fill-ins like {{first_name}} that are replaced with the customer's details.
When to use it
- You always need to record something Crulex doesn't ask for, like a gate code, a PO number or a panel location.
- You want to filter or sort a list by your own field.
- Your team keeps typing the same messages and you want one agreed wording.
Before you start
- Available on: the Pro plan, for custom fields.
- You need a role that can change company settings to add fields or templates. Everyone in the office can read the templates.
- Decide which record the field belongs on: customers, service addresses, leads, estimates, jobs, visits or invoices.
Steps
- Go to Settings and click Custom fields in the settings menu. Click the record type at the top (Customers, Leads, Estimates, Jobs, Invoices and so on).
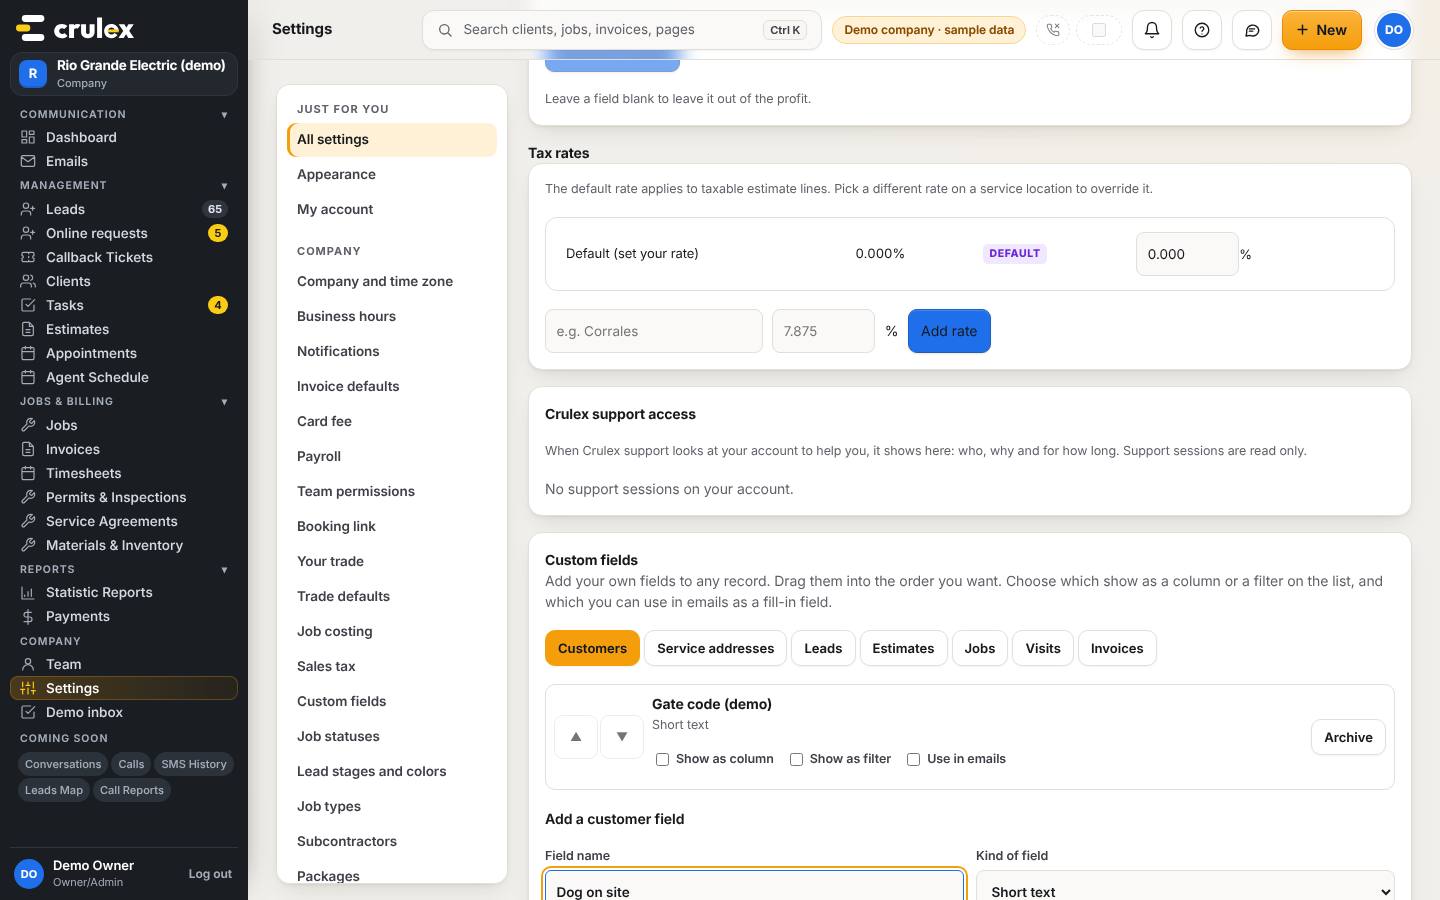
The Custom fields section with record tabs and the add field form - Under Add a … field, type a Field name, choose the Kind of field (short text, number, date, pick one and so on), tick Required on new records if needed, and click Add field.
- On the field's row, tick Show as column and Show as filter to add it to that list, and Use in emails to make it a fill-in. Use ▲ and ▼ (or drag) to change the order. Archive hides a field without losing what's stored.
- Open a job, lead, estimate or invoice: your fields are on its Custom fields card. Customer fields are on the customer's page.
- For templates, click Message templates in the settings menu. To start quickly, click Add starter templates.
On a phone: The settings menu is a row of buttons across the top; swipe it sideways to find Message templates.
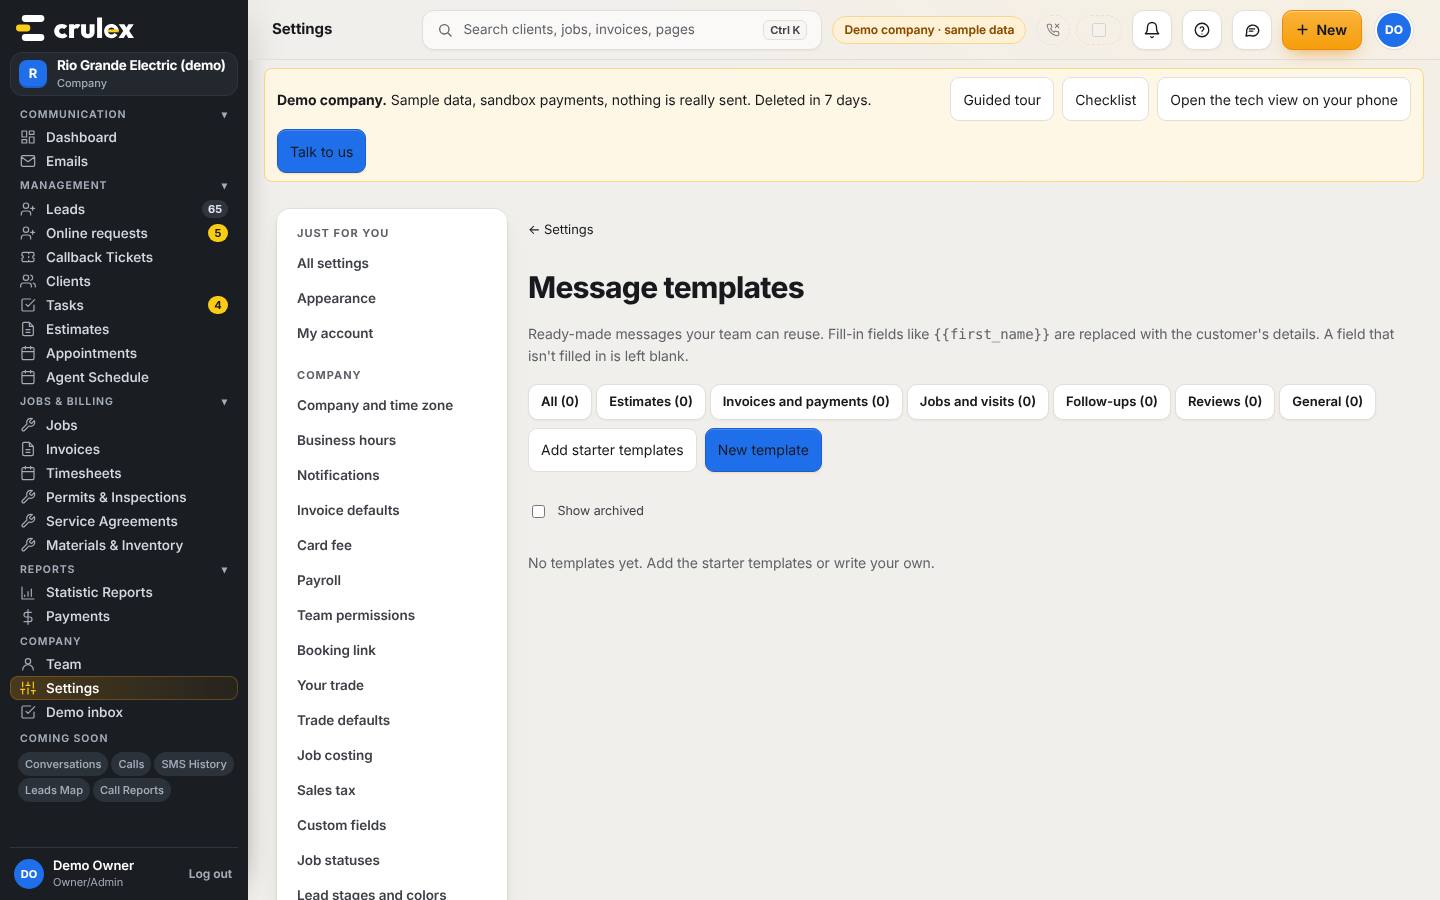
Message templates grouped by category, with New template - Click New template. Give it a Name and Category, type the Subject (for emails) and Message, and click the fill-in buttons (for example Customer's first name) to add them where your cursor is.
- Check the Preview. To see it with a real customer, type their name under Fill in with a customer. Then click Save template.
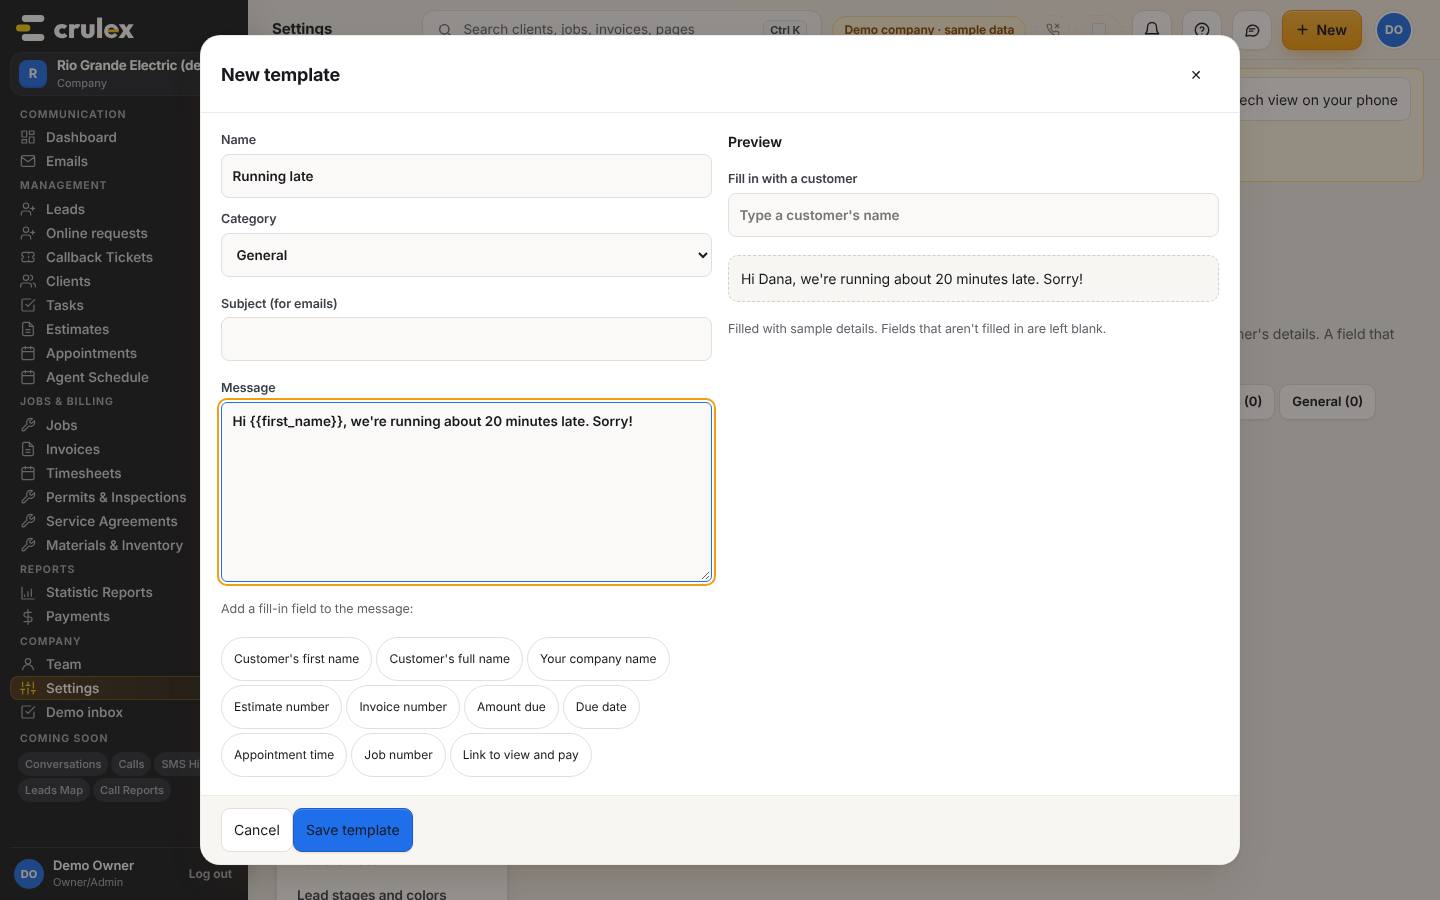
The New template form with fill-in buttons and a live preview

How to check it worked
- The new field shows in the list for that record type, and as a column or filter on the list if you ticked those.
- The new template appears under its category, and the count on the category goes up.
- The preview shows the customer's details in place of each fill-in.
Common mistakes
- Typing a fill-in by hand that doesn't exist, like {{nickname}}. Crulex refuses it with "isn't a fill-in field. Pick one from the list." Use the buttons instead.
- Adding a field twice with the same name. Archive and restore the old one instead.
- Choosing Dollar amount for something staff without price access need to see. Dollar fields are hidden from anyone whose role can't see prices.
- Expecting to send a template from a customer's page. Templates are a library to copy from for now.