
What it is
The Customers screen lists every person and company you work for. A customer's record holds their profile and billing address, the Contacts who deal with you (for example a property manager), the Service locations where you do the work, follow-ups and notes. Its Timeline shows every lead, estimate, job, invoice and payment, newest first, and other tabs hold their documents, payments, plans and files.
When to use it
- A new customer calls and you want to add them before writing an estimate or booking a job.
- A customer has more than one property, or a different person to send estimates or invoices to.
- You need to see everything you've done for a customer, or find a photo or file from an earlier visit.
Before you start
- You need permission to see customers. Adding or changing them needs permission to edit customers; deleting needs its own permission.
- Customers made from a lead or an online request already have their contact and location filled in, so check before adding them again.
- Bringing in a long list? Use Import customers in Settings instead (see the import guide).
Steps
- Click Clients in the sidebar. The Customers screen opens. Use the chips (All, People, Companies, New, No email), More filters and Columns to narrow the list, and Save as view to keep a filter you use often.
On a phone: Tap Clients in the bar at the bottom of the screen. The number boxes sit two across, and the filter chips scroll sideways.
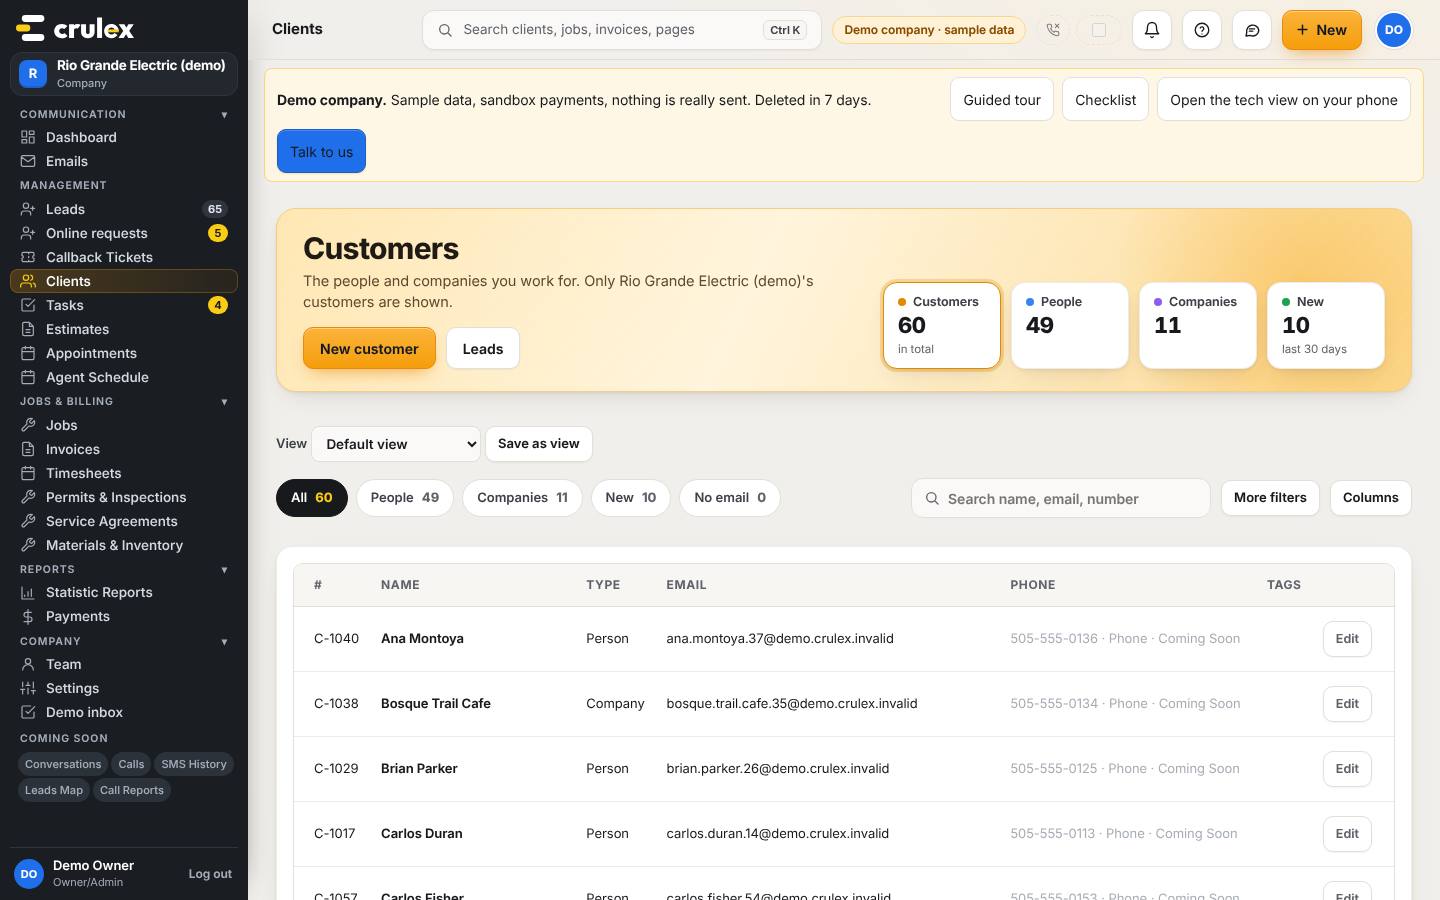
The Customers list with the filter chips, More filters and Columns - Click New customer. Type the Name, pick Individual or Company, add the Email and billing address, then click Add customer.
- Click a customer's name to open their record. The Overview tab shows the Timeline, Profile, Contacts, Service locations, Follow-ups and Notes & activity. Click any line in the timeline to open that record.
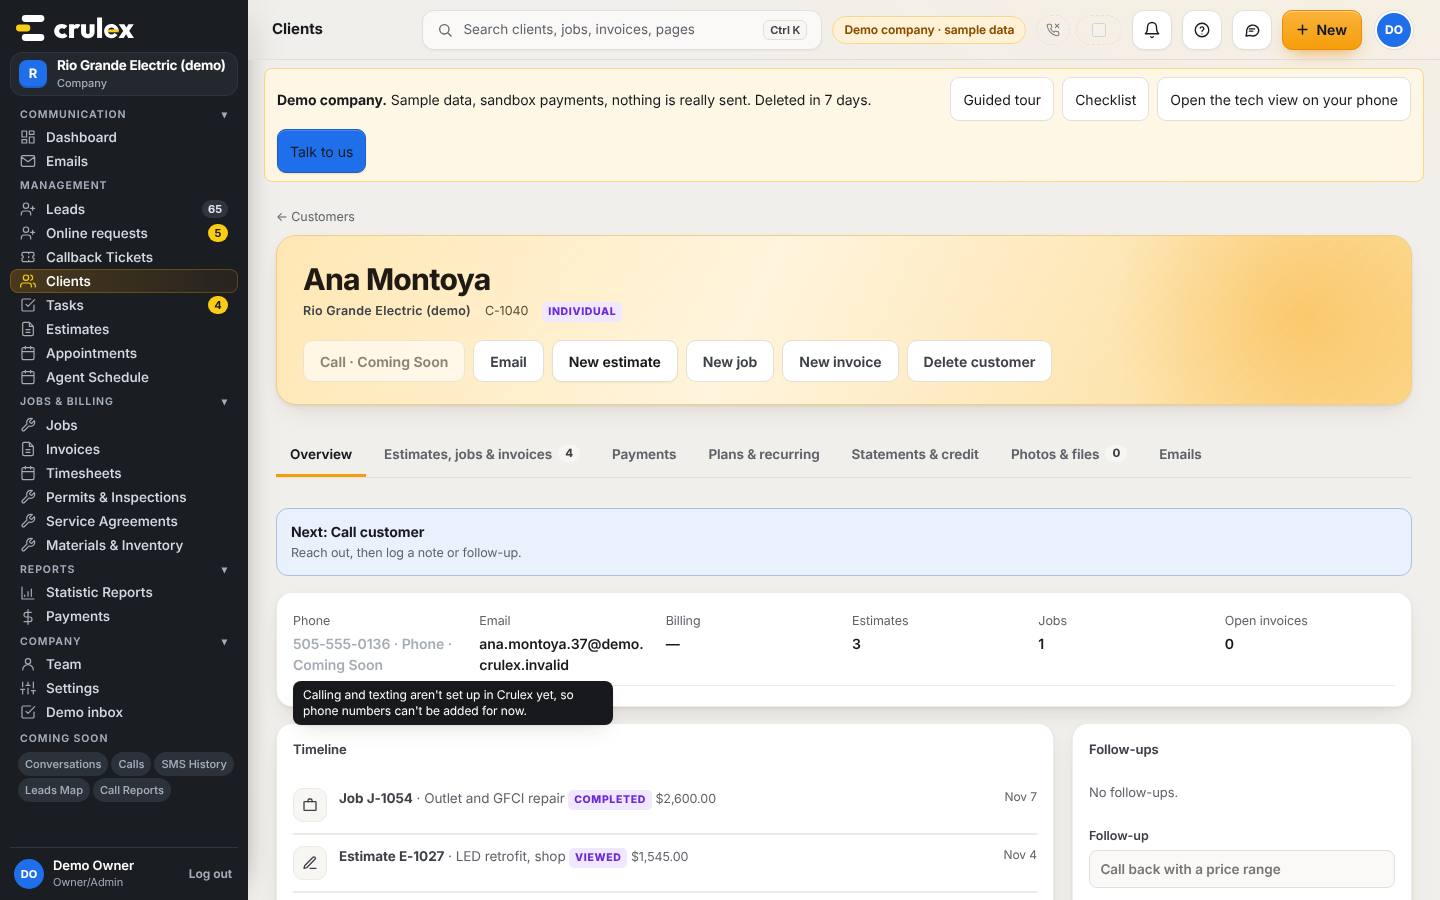
A customer's Overview tab with the timeline and profile - Under Contacts, click Add contact. Fill in the name, Title and Contact email, tick Primary contact if they're the main person, choose a location under For location (or Every location), then click Save contact.
- Under Service locations, click Add location. Give it a Location name, pick Residential or Commercial, type the address and any Access notes (like a gate code), then click Save location.
- Open the Photos & files tab and click Upload to attach a file. Photos taken on a job also land here, and they show on every estimate, job and invoice for this customer.
- Use New estimate, New job or New invoice at the top of the record to start one with the customer already picked.

How to check it worked
- The new customer shows in the Customers list, and the New chip count went up.
- The contact and location appear on the Overview tab, and the location can be picked as the Service location on a new estimate.
- On an estimate, invoice or job for this customer, the Contact box lets you pick the contact you added.
Common mistakes
- Adding a second customer for the same person or company. Search for them first, and add another Service location for a new property instead.
- Looking for a phone box to fill in. Calling and texting aren't set up yet, so new phone numbers can't be added for now; the box shows Coming Soon.
- Trying to delete a customer with visits coming up. Delete customer shows everything that would go with them and won't let you delete while visits are still booked: cancel those first.